
Separating public WiFi from your terrestrial LAN with a DrayTek Router and Netgear Switch
In this example we are going to use an older Netgear switch as it is the one in place but this method will work equally as well for the GS752 or XS series, although the interface has been updated somewhat.
Fist of all it is important to not that the default DrayTek setup for ports is an untagged VLAN ID 10 and for Netgear it is a default untagged VLAN of ID 1
What this means is that by default, all the ports on the Netgear assume they are in VLAN1 if the data traffic packets are not 'tagged' with a number. So if you plug in your DrayTek AP910 and use the default VLAN of 10 then your WLAN will not reach your router. In this case we are not going to change any untagged port settings as we are onyl making a single 'tagged' VLAN so there will be no confusion. The important thing to note here is that each port can only have a single VLAN for 'untagged' becuase if there is no tag (no label to tell the device which VLAN to send the traffic to) then there can only be one default failback choice. There can only be one default for anything after all.
So bearing that in mind we are going to take the following action:
- We will make a VLAN on the DrayTek 3900 called sirclesPUB VLAN ID: 3
- To this VLAN we will tag the LAN port connected to the Netgear switch so that th e traffic labelled with VLAN ID:3 knows it should go to the Netgear switch.
- We will make a subnet associated with this LAN on the DrayTek with a different subnet to our usual 192.168.1.0/24 network
- We will use the inbuilt DHCP server onm the DrayTek and assign the ISPs DNS servers to the DHCP clients as they will not have access to the local Microsoft AD/DNS
- We will make an associated VLAN on the Netgear with VLAN ID: 3
- We will tag the ports connected to the DrayTek 3900 and the DrayTek AP-910 with this VLAN ID so tha the traffic know where to be routed
- We will associate the public WLAN with the VLAN ID so that the traffic that is tagged by the WLAN as VLAN ID: 3 remains separate and can be routed straight back to the router without interraction with the untagged default private LAN.
So let's get started, we login to the DrayTek 3900 and open up the LAN > General Set-up section.
Click Add to add a new LAN Profile, in this example we will use a Class B Subnet of 172.16.0.1/16:
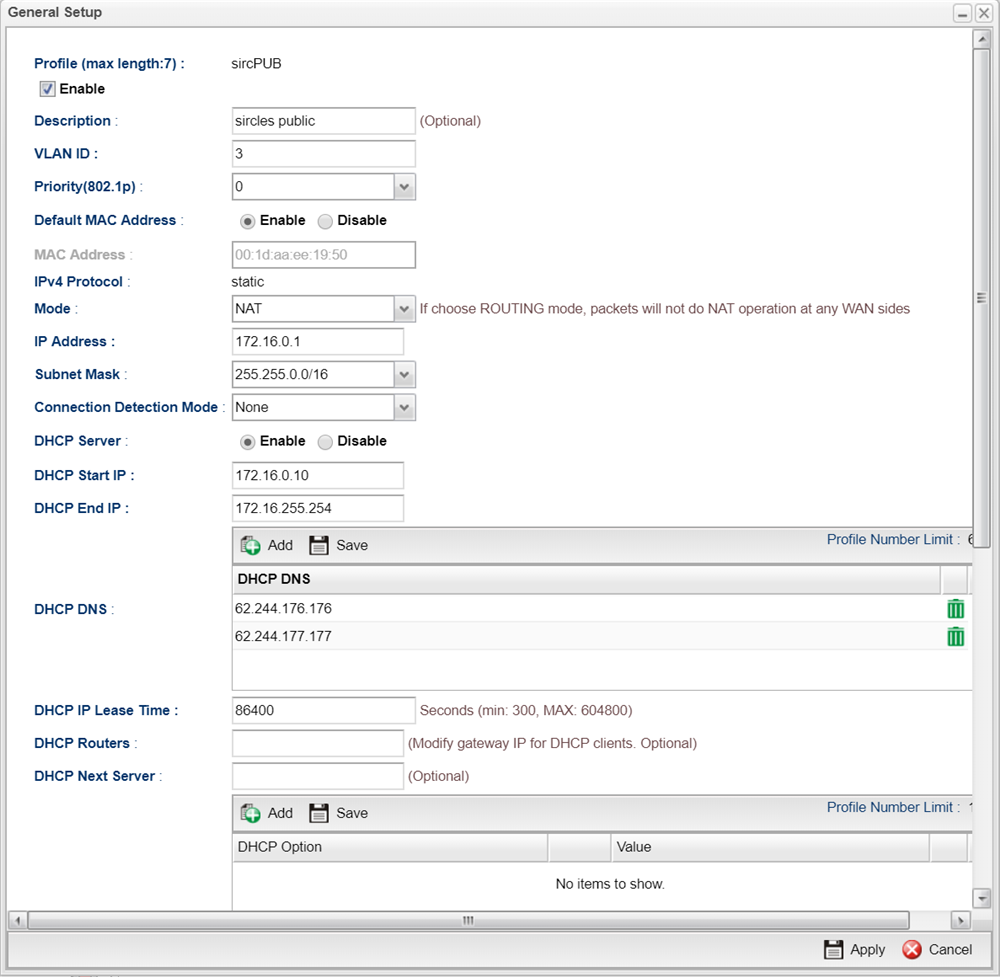
The VLAN ID is set to 3
Our mode is NAT
Our router IP will be 172.16.0.1
We are choosing a /16 subnet
We enable DHCP server
We have chosen a huge range in this case but the WLAN is restricted to 64 clients at once by the defaul of the AP-910
We add the ISP DNS server addresses
Everything else can be left at default in this example as it is only a public Wi-Fi
Click Apply
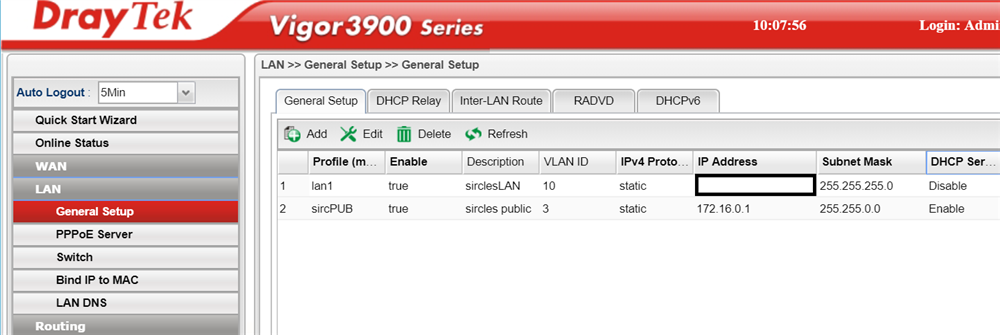
In our example we see that the LAN has been successfully created:
Now we move on to LAN > Switch section:
Under the 801.1Q VLAN section we click the Add button to add the new VLAN:
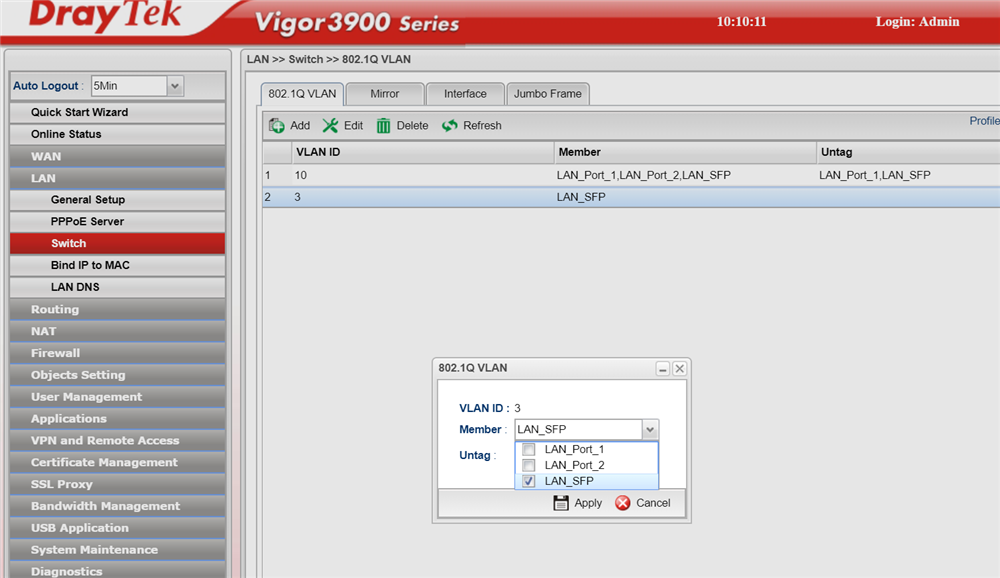
We are making the SFP (fibre module) the tagged member in this case (DrayTek just call it a member rather than tagged) and we do not touch the untagged settings as we could lock ourselves out of the router if we do! In this set-up the DrayTek connects to the Netgear via SFP but you may well be selecting LAN_Port_1 in your example.
Click Apply to create the VLAN.
Now we have a separate network on a separate IP range with a tagged VLAN ID of 3, we must tell the Netgear switch to expect this tagged information on certain data packets and tell it what to do with them.
Open up the Netgear interface on your switch by browsing to the IP address.
Open up switching > VLAN
Create a new VLAN:
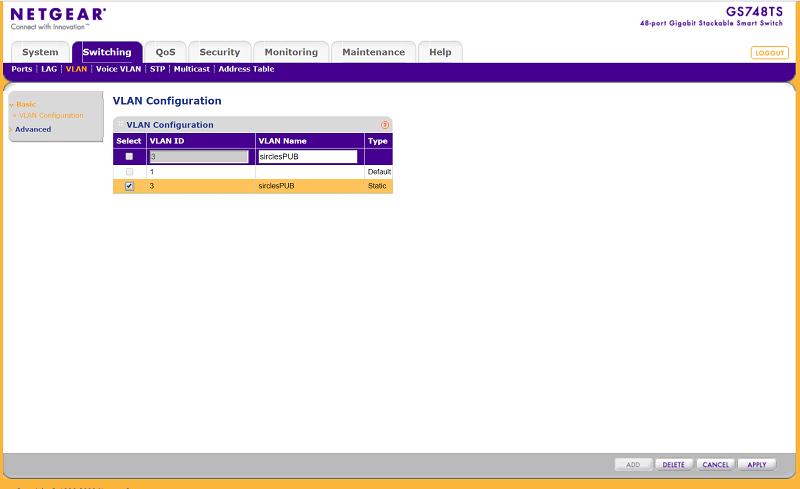
We have given it a name to show what it is for but the name is just a label and only the VLAN ID: 3 is important
We now go to the member ship of the VLAN to choose the ports under Advanced:
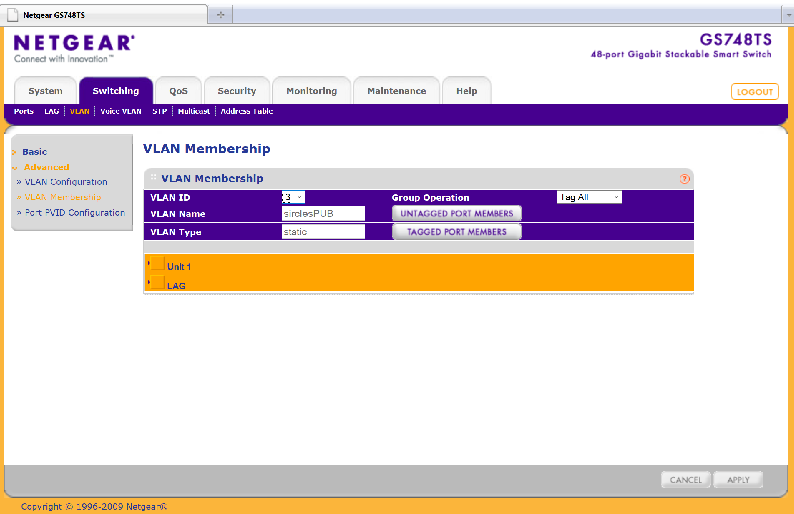
We choose the VLAN ID at the top to be our chosen new VLAN ID of 3
in this case the switch is describing itself as unit 1 and so we click the text to reveal all the ports:
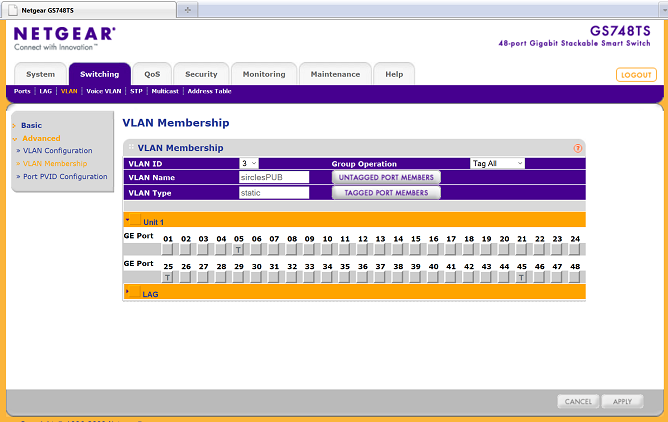
We are tagging the ports and so they need to be populated with a T for Tagged
Port 5 is where our DrayTek AP910 is plugges in (there must be no other switches in between or you will have to configure them for the VLAN also)
Port 45 is our SFP for the fibre
Now we click Apply and we are ready to configure our public Wi-Fi:
I am using the central AP management feature of the DrayTek 3900 and so I browse to the WLAN profiles and select the SSID of the public network:
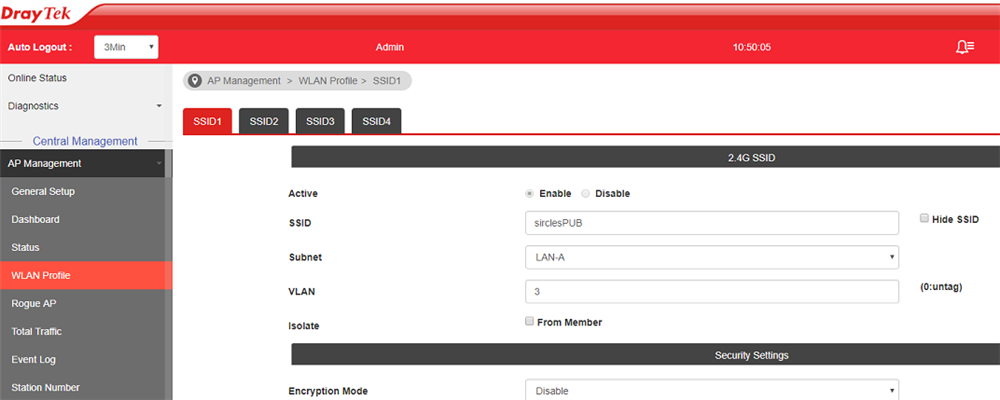
As you can see we have set the VLAN ID to be 3 and the security as Disabled
Using a mobile device I connect to sirclesPub wifi:
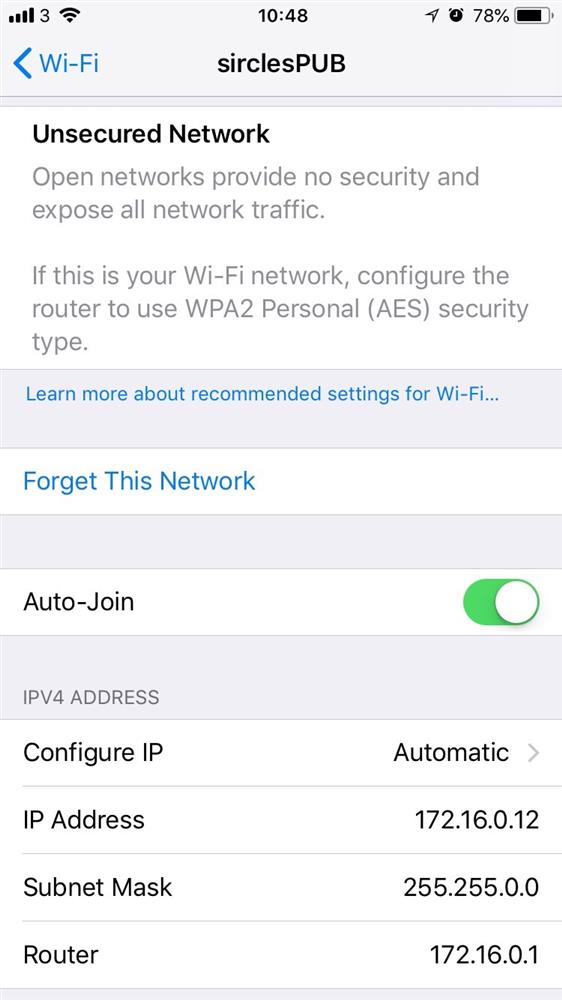
As we can see under the information section in the Wi-Fi settings the system has been assigned the correct IP range and cannot communicate with the private LAN.